Host WordPress on Azure in the Simplest Way
In this blog, we are going to host WordPress on Azure. We will create and host a WordPress website on Azure using WordPress Bitnami stack and add the custom domain to it.
Introduction
WordPress is one of the world’s most popular web publishing platforms for building blogs and websites. From blogging to e-commerce to business and portfolio websites, WordPress is a versatile CMS. Designed with usability and flexibility in mind, WordPress is a great solution for both large and small websites.
There are different ways of hosting a WordPress site on Microsoft Azure. In this blog, we are going to use the Bitnami stack where we will use Bitnami WordPress pre-configured Ready-to-Run Image.
This is a simple way to host WordPress site on Azure.
Check here if you would like to Install WordPress on Ubuntu 20.04 Linux in Azure VM
Create a Virtual Machine
First login to your Azure Portal and click on Create a resource.

Then, search for ‘wordpress’ and hit Enter.
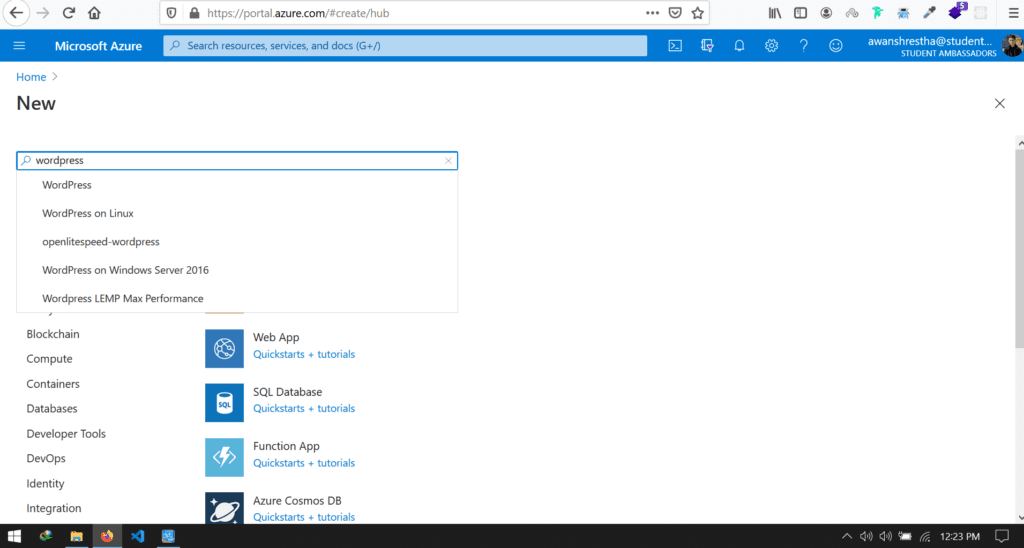
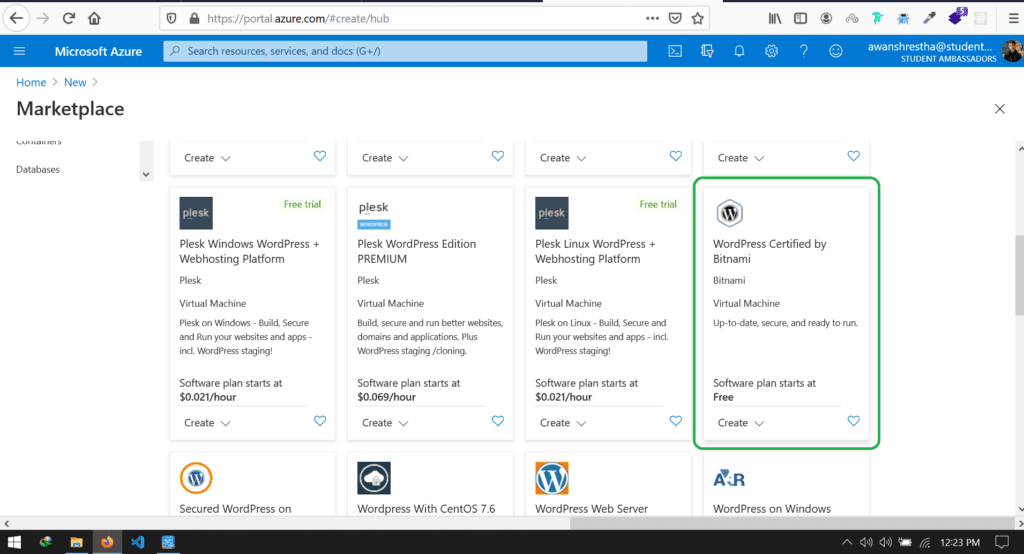
The next step is to search for WordPress Certified by Bitnami and click on it.
Host WordPress on Azure
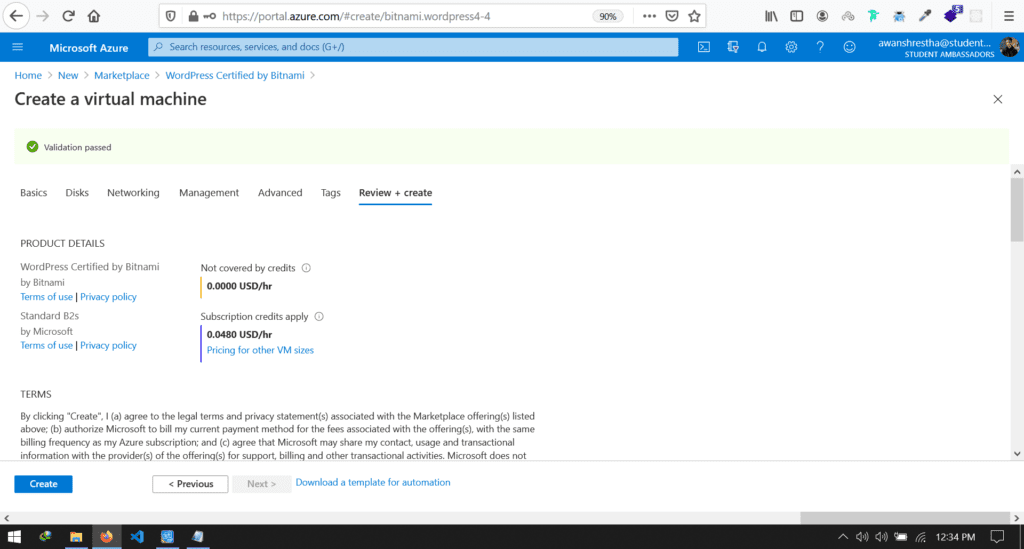
Then hit Create.
After that, fill out some basic information. Choose your Subscription and resource group. Create a new resource group if you don’t have any. Then your VM name, region, machine size and your username and password.
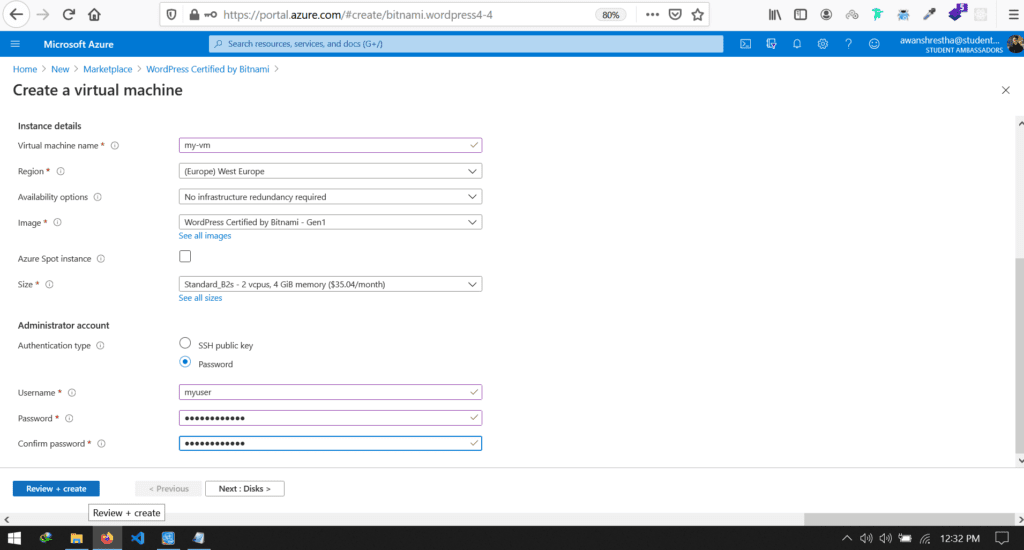
Then click on Review + create. If it is still asking for some details, fill that and hit Create.
After the installation, Go to the resource and under Essentials, you can see the Public IP address.
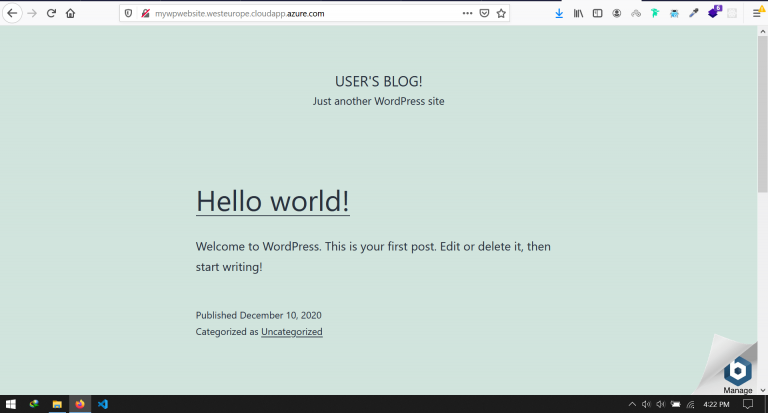
So, copy that and open it on your browser.
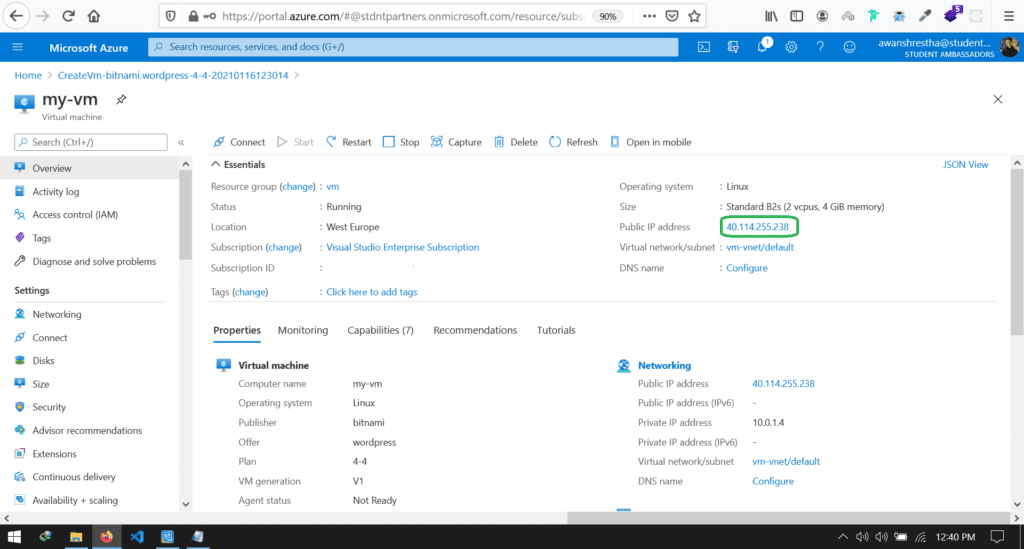
Just a few clicks and now you have your WordPress site on Azure.

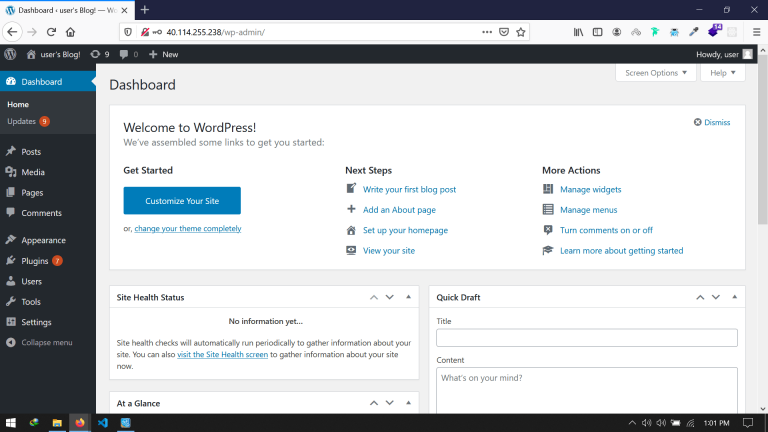
Access to WordPress Admin Dashboard
Now, to access the WordPress Admin Dashboard, go to ‘http://your-public-IP-address/wp-login.php‘. Eg: http://40.114.255.238/wp-login.php
Now for username, the default username if ‘user‘.
And for password, in your Azure VM Dashboard, go to Boot diagnostics.
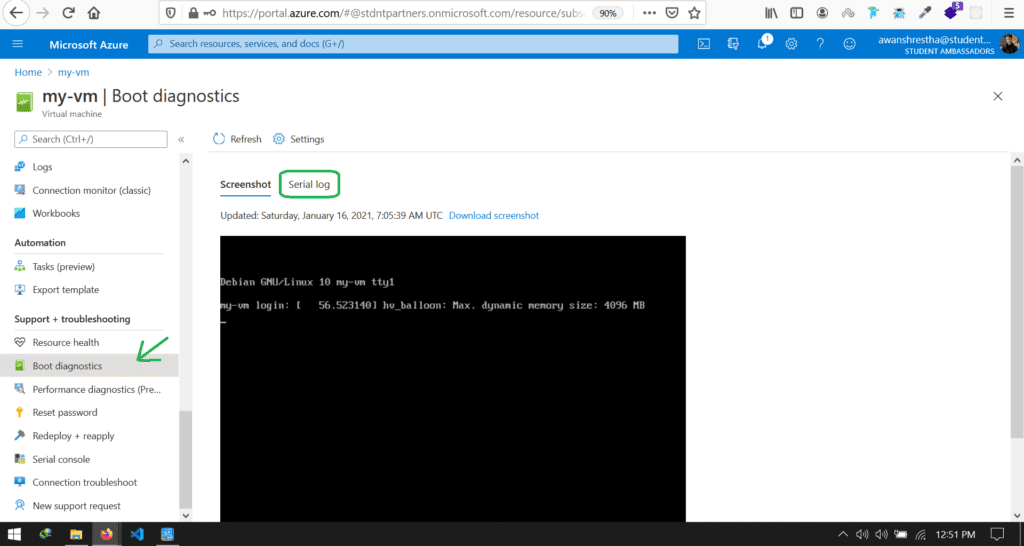
Click on Serial log and once it loads, click somewhere on your log. Then press ‘CTRL + F‘ and search for ‘password‘. Search for next match until you find something like “Setting Bitnami application password to ‘************’“.
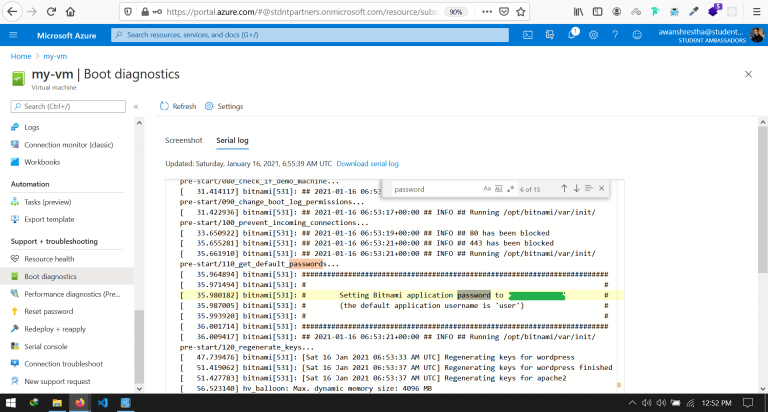
The ‘************‘ is your WordPress Admin password.
See Is your password weak? And Why you should Not use a Weak Password.
In this way, you can access your WordPress Admin Dashboard.
Connect to Virtual Machine on Azure that has WordPress Hosted
Now to connect to the virtual machine in Azure, there are different ways. In this blog, we are going to use the simple way via terminal.
To work with commands, we can use any SSH clients like PuTTY, KiTTY, Xshell 5, Git Bash, etc. Here I am going to use Git Bash.
Open Git Bash and enter the ssh command:
ssh username@DNSLabelFor example here, I had used ‘myuser‘ as username and my public IP address is 40.114.255.238.
So, I will use:
ssh myuser@40.114.255.238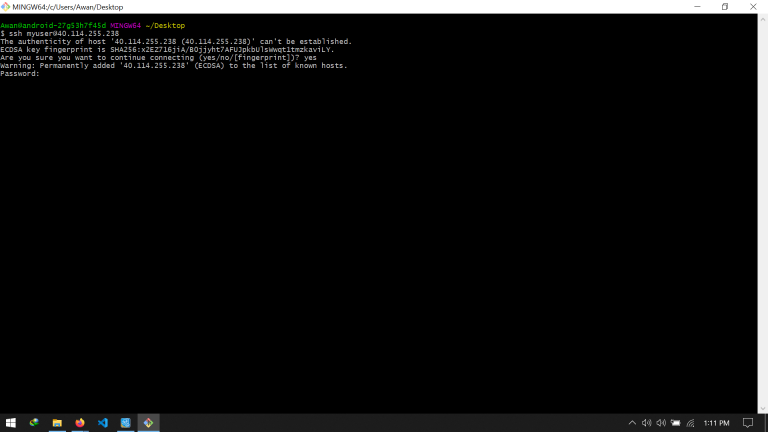
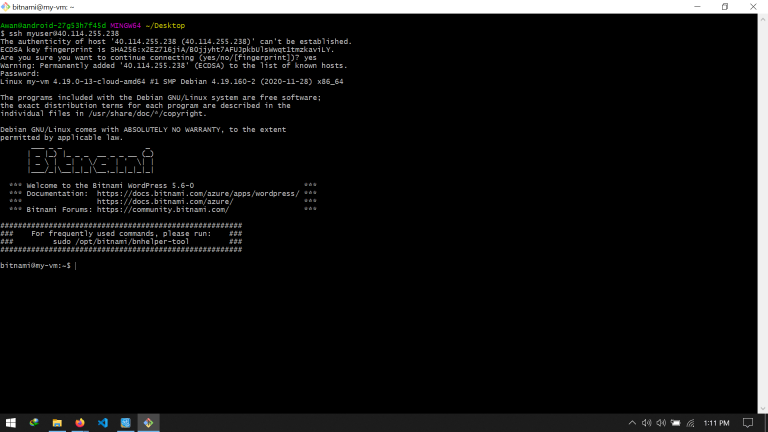
Enter the password and you have connection with your VM.
Remove the Bitnami Badge from Azure WordPress
Since now, we have connection with our VM, one thing we can do is to remove the Bitnami badge which appears on bottom right of our site.
To remove the Bitnami badge, simply use the command below, while you have connection with your VM.
sudo /opt/bitnami/apps/wordpress/bnconfig --disable_banner 1Refresh the page and the badge should be gone now.
Add Custom Domain to the VM
Now of course we cannot tell our user to type the public IP address, 40.114.255.238, every time to visit our website. So, to add the custom domain to your VM, we will be using CNAME record here.
If you want to know more about how domain names resolves to IP address, please check out this post on How the Web Works.
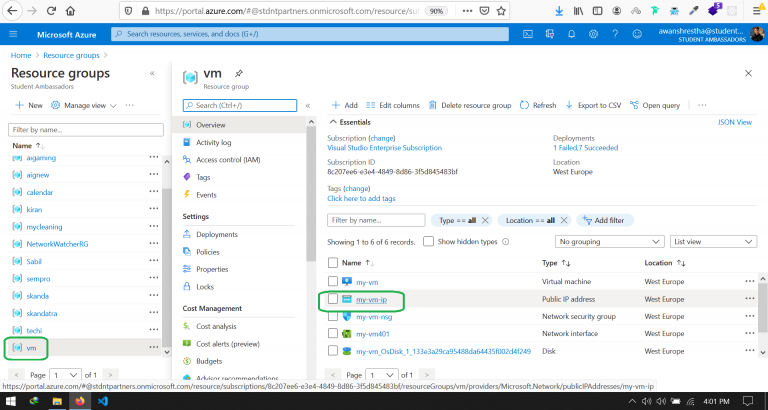
Now from your resource group, choose the resource group where your vm is. In our case it is ‘vm‘.
Then choose the Public IP Address.
Go to Settings, then inside that, Configuration.
In the ‘DNS name label (optional)‘ section, type a unique name and if it is available, hit Save.
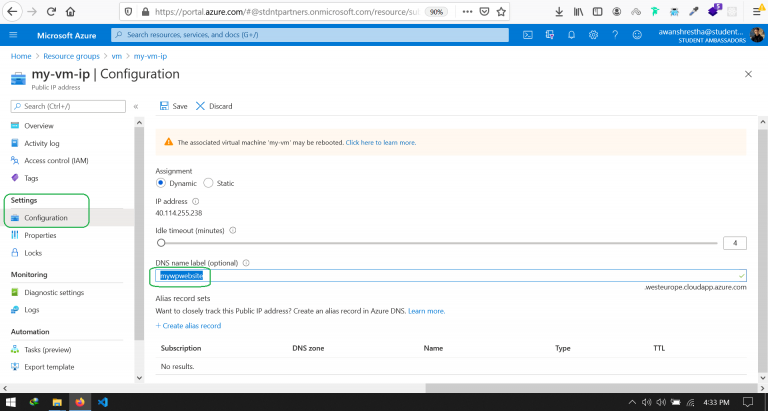
So, now your DNS name label will be ChosenName.VMLocation.cloudapp.azure.com. Meaning, you can access your website using this URL.
In my case, I have used the name mywpwebsite. And my VM location is west Europe. Thus now I can access my site via the URL : http://mywpwebsite.westeurope.cloudapp.azure.com/
Now all we need to do is align our custom domain name with this DNS name label. Go to your DNS provider site and manage DNS settings. Fill the fields as:
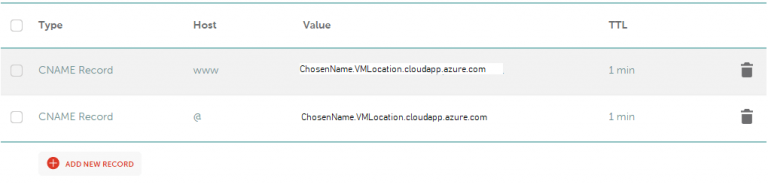
Save the DNS settings and you are all set.
You should be able to access your VM using your custom domain name.
In this way, we have hosted WordPress on Azure.
Would you like to Install WordPress on Ubuntu 20.04 Linux in Azure VM
If this was helpful, how about buying me a coffee ?


![[Working] How to install WordPress on Ubuntu 20.04 Linux | Azure VM](https://awan.com.np/wp-content/uploads/2021/07/Install-WordPress-on-Ubuntu-768x576.jpg)

Thanks! Helped a lot.