Optimizing Costs and Enhancing Performance: Leveraging a Single Load Balancer for Multiple Websites

Introduction:
In today’s rapidly evolving digital landscape, website performance and cost efficiency are critical factors for businesses aiming to stay competitive. Load balancing is a fundamental technique used to distribute incoming network traffic across multiple servers, ensuring optimal resource utilization and preventing server overload. In this blog, we’ll explore how you can maximize cost savings by using a single load balancer to efficiently manage traffic for multiple websites.
The Importance of Load Balancing:
Load balancing plays a pivotal role in ensuring high availability and reliability for websites. By distributing incoming traffic across multiple servers, a load balancer not only enhances performance but also minimizes the risk of server failures. Traditionally, businesses would deploy separate load balancers for individual websites, incurring additional costs for hardware, software, and maintenance. However, a more cost-effective approach involves using a single load balancer to manage traffic for multiple websites.
Benefits of Using a Single Load Balancer:
- Cost Savings: Consolidating multiple websites onto a single load balancer eliminates the need for redundant infrastructure. This results in significant cost savings on hardware, software licenses, and maintenance.
- Simplified Management: Managing a single load balancer is inherently simpler than managing multiple instances. Centralized configuration and monitoring streamline administrative tasks, reducing the risk of errors.
- Improved Resource Utilization:By efficiently distributing traffic, a single load balancer ensures that each server operates at an optimal capacity. This not only improves performance but also maximizes the utilization of resources.
- Enhanced Security: Centralized security configurations at the load balancer level can be more effectively managed and monitored. This helps in implementing consistent security policies across all websites.
Step 1: Creating EC2 Instances
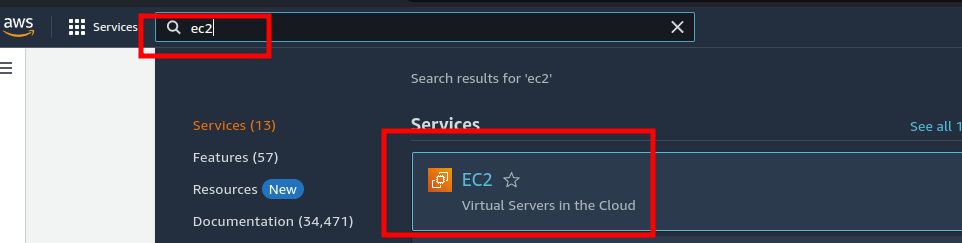
1.Accessing AWS Management Console:
- Go to the AWS Management Console and select EC2 from the services menu.
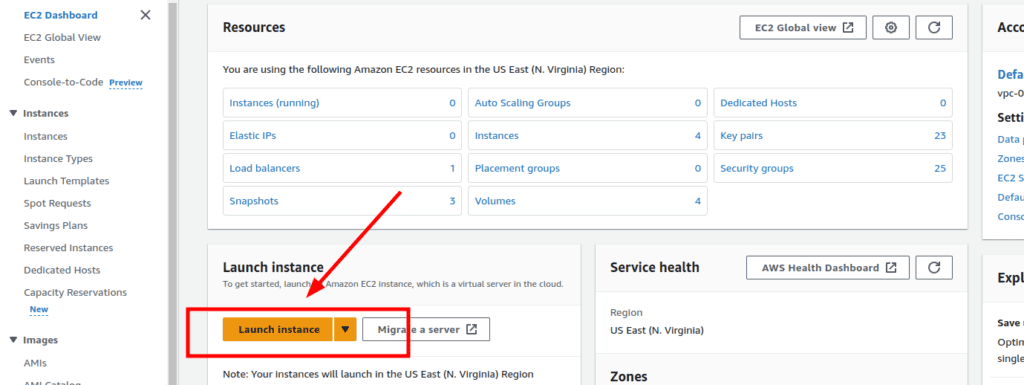
2.Launching the First Instance:
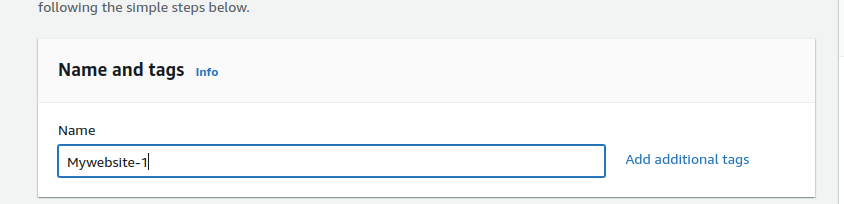
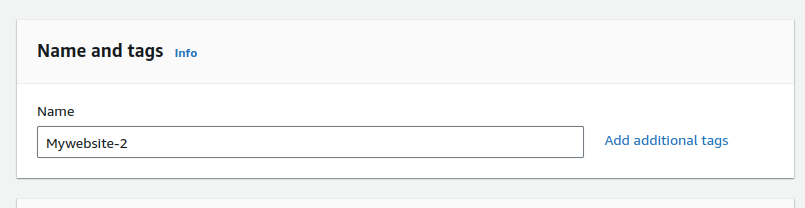
- Click on “Launch Instance” to begin the process.
- Provide a name for your server, for example, “Mywebsite-1.”
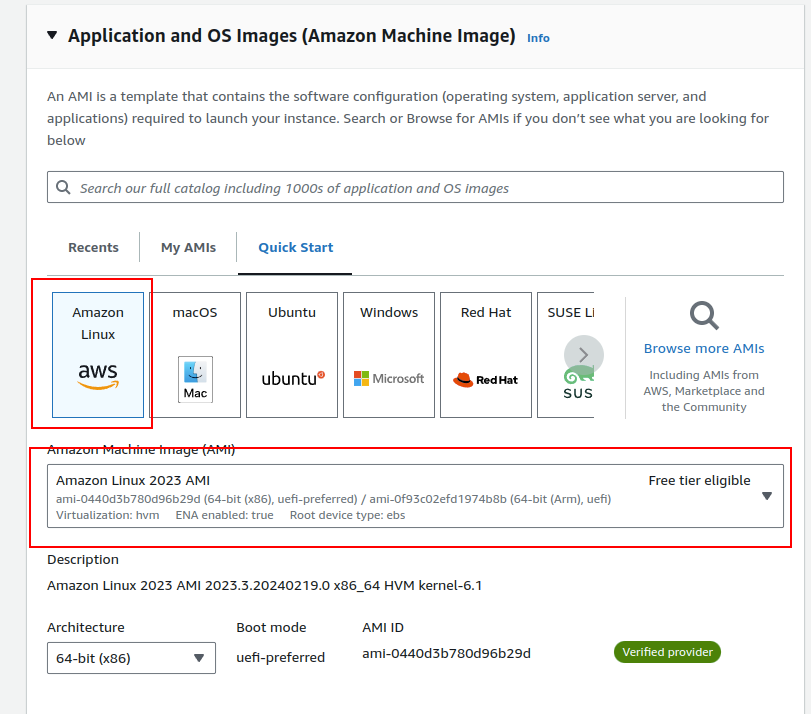
3.Choosing Amazon Machine Image (AMI):
- Select an Amazon Machine Image. For this example, we are using Amazon Linux.
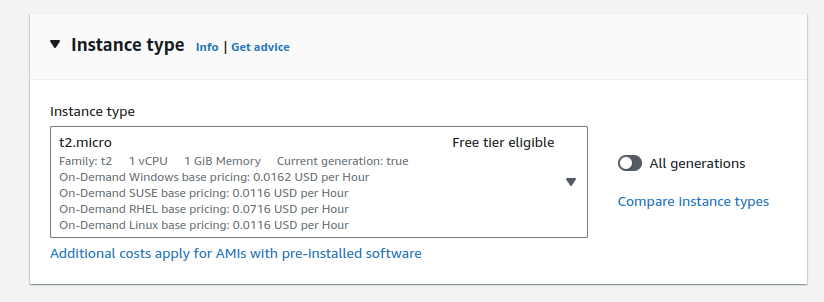
4.Selecting Instance Type:
- Choose an instance type. We recommend t2.micro for this tutorial as it falls within the AWS Free Tier.
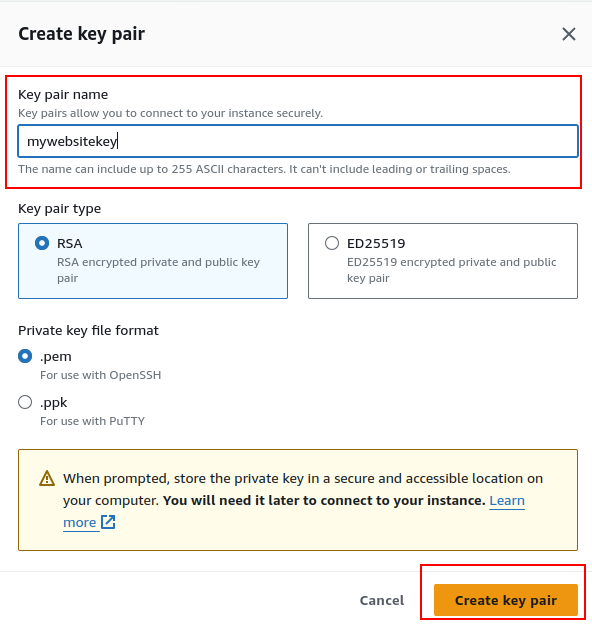
5.Setting Up Key Pair:
- Create a new key pair by clicking “Create a new pair” and giving it a name.
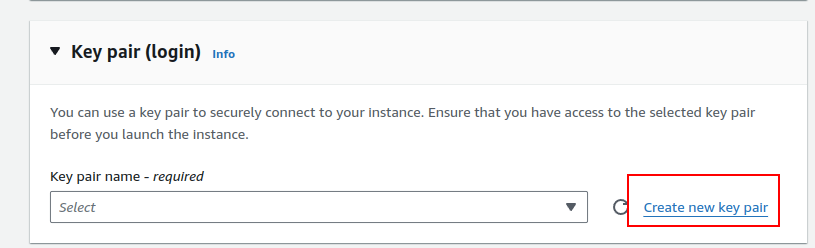
- For Windows, use PPK, and for Linux and Mac, use PEM. Click “Create key pair.”
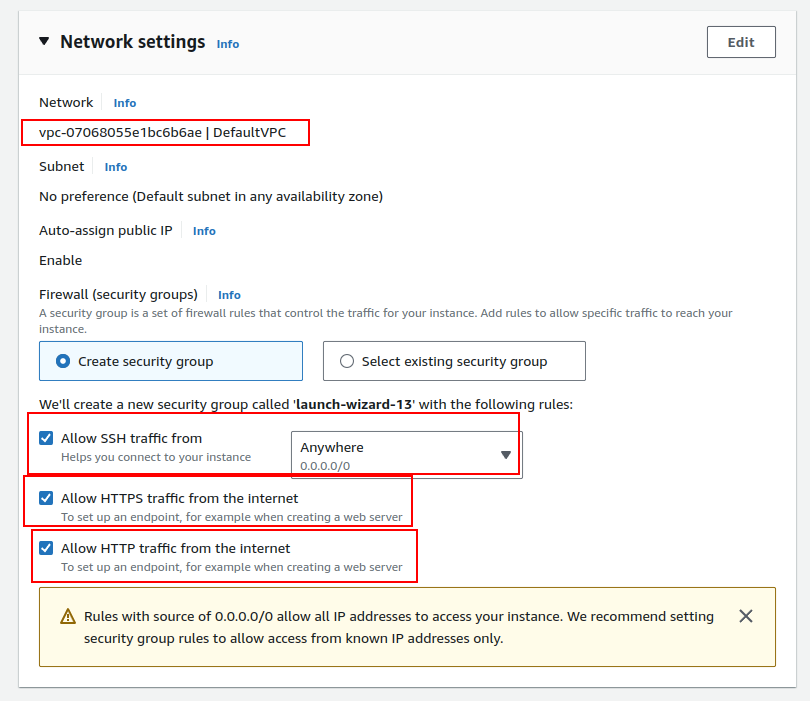
6.Configuring Network and Security:
- Use the default VPC for network settings.
- In the security group, allow SSH, HTTP, and HTTPS traffic.
7.Advanced Options and User Data:
- Expand the advanced options and use the following user data:
| #!/bin/bashyum update -yyum install -y httpdsystemctl start httpdsystemctl enable httpdecho “<h1>Hello World from Website-1</h1>” > /var/www/html/index.html |
- Launch the instance.

8. Launching the Second Instance:
- Repeat the process to launch the second instance, but give it a different name (e.g., “Mywebsite-2”).
- Use the following user data for the second instance:
| #!/bin/bashyum update -yyum install -y httpdsystemctl start httpdsystemctl enable httpdecho “<h1>Hello World from Website 2 Two (Two) </h1>” > /var/www/html/index.html |
- Launch the instance.

Step 2: Creating Target Groups
1.Accessing Target Groups:
- Navigate to the EC2 Dashboard and click on “Target Groups” in the left navbar.

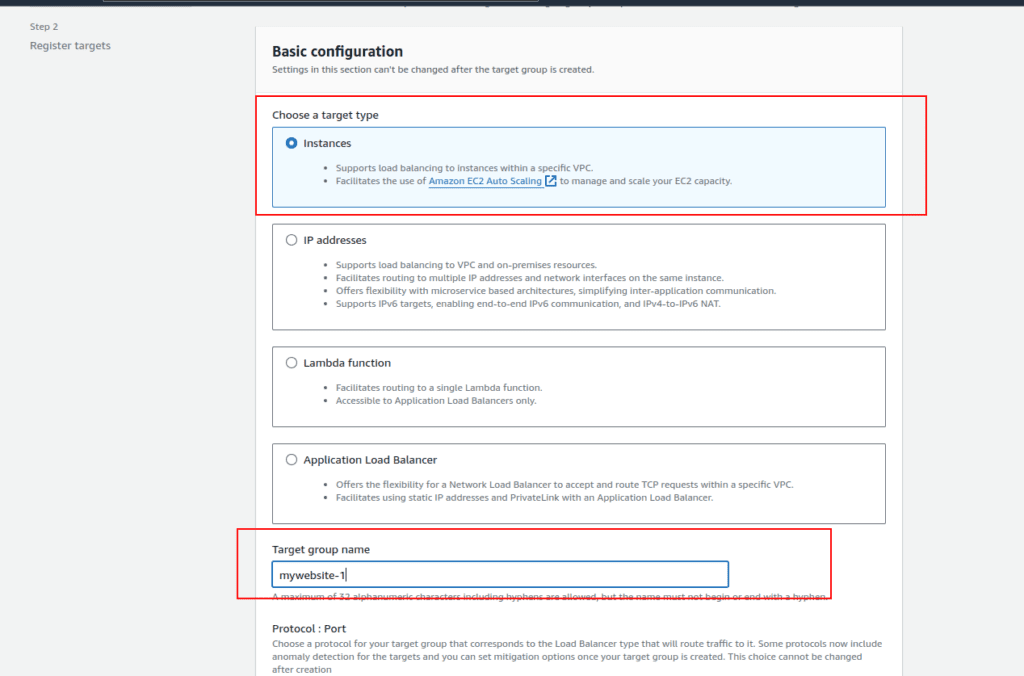
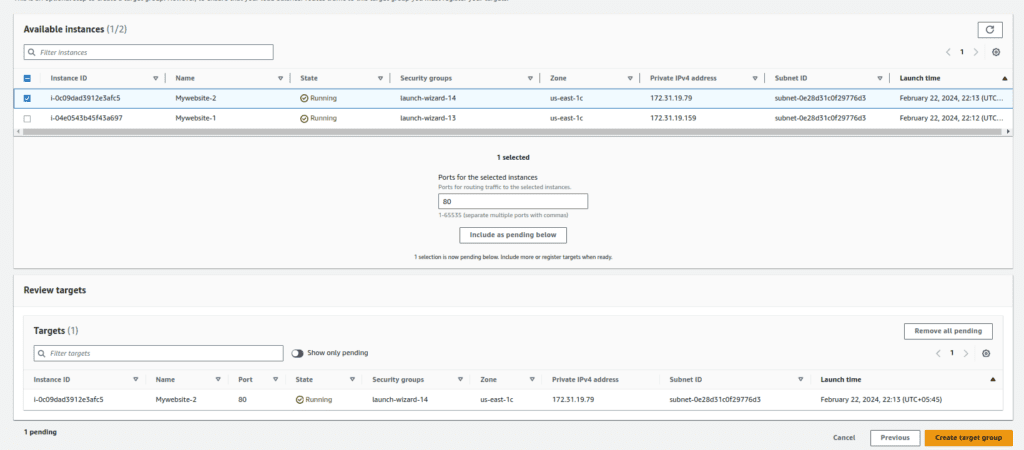
2.Creating Target Group for Mywebsite-1:
- Click on “Create Target Group.”

- Choose the target type as “Instance” and assign a name, such as “Mywebsite-1.”
- Select the Mywebsite-1 instance and click “Include as Pending” below.
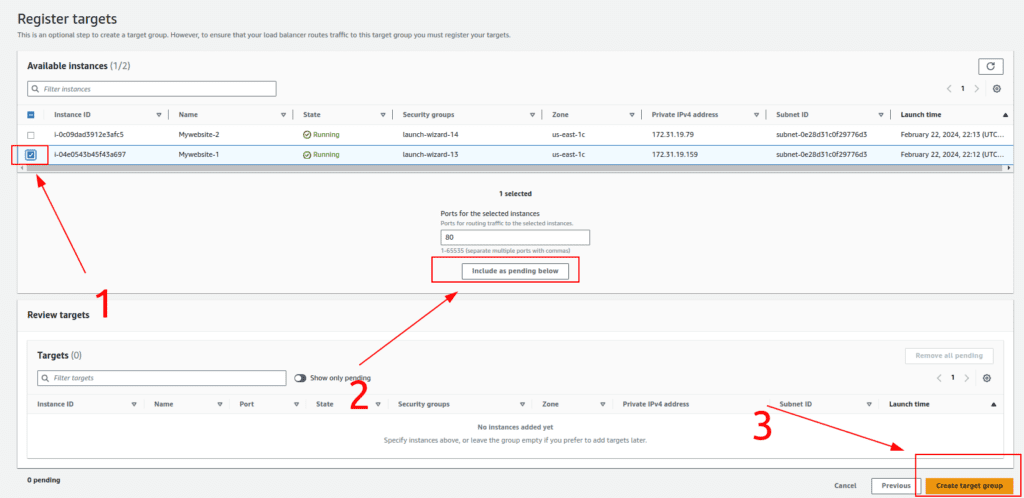
- Complete the creation of the target group.
3.Creating Target Group for Mywebsite-2:
- Repeat the process to create another target group for Mywebsite-2.
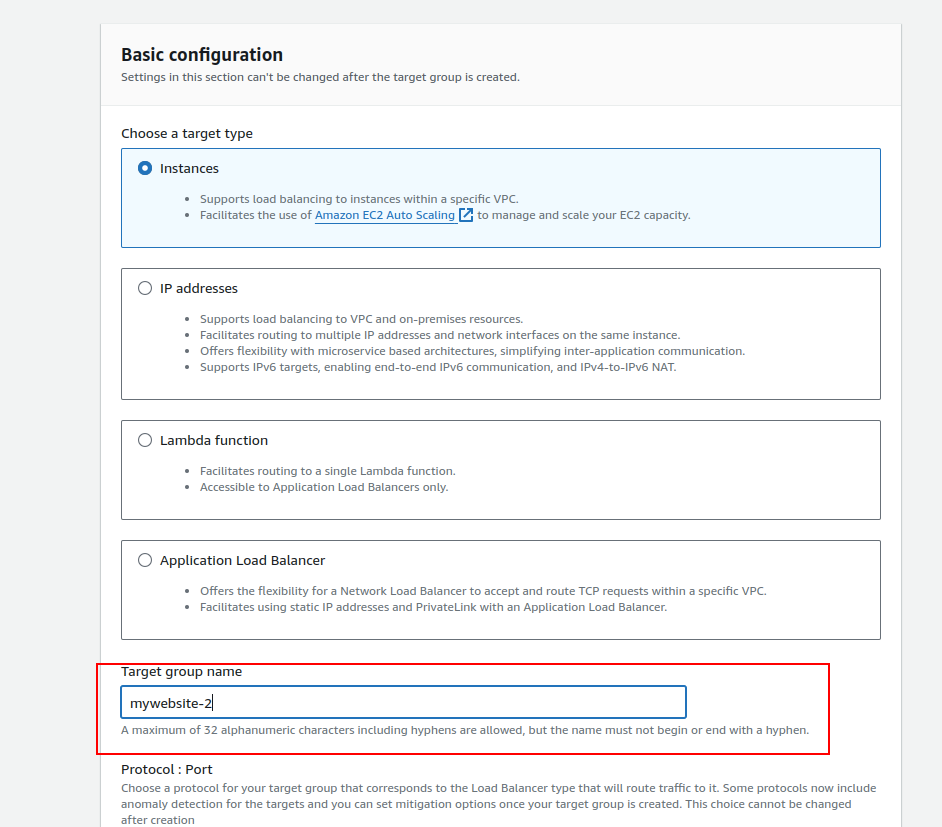
- Choose a different name (e.g., “Mywebsite-2”) and include the Mywebsite-2 instance.
- Complete the creation of the second target group.
Step 3: Creating Load Balancer
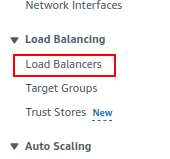
1. Accessing Load Balancer:
- Click on “Load Balancers” in the left navbar.
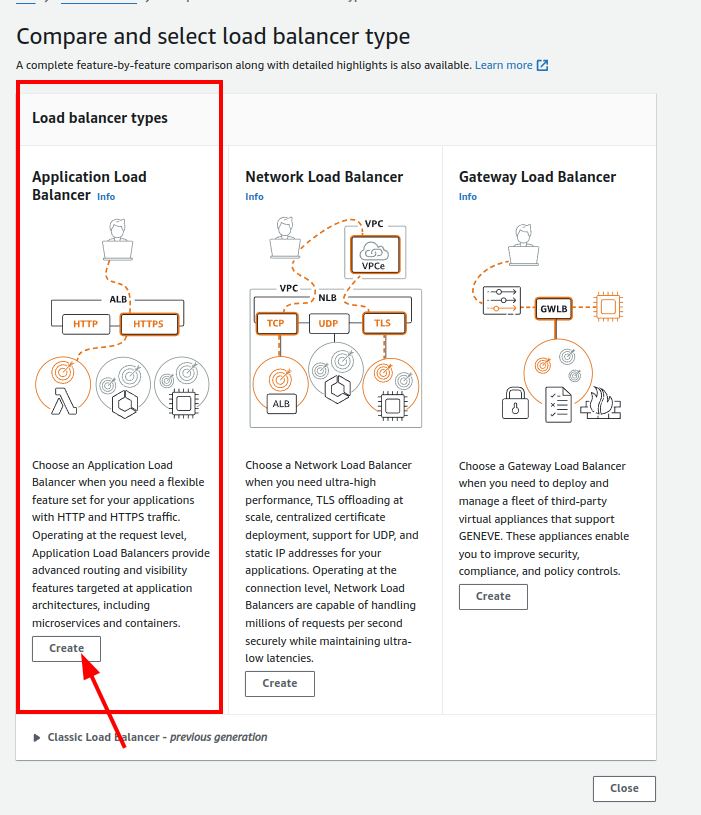
2.Creating Application Load Balancer:
- Click on “Create Load Balancer.”

- Choose “Application Load Balancer.”
3.Configuring Load Balancer Settings:
- Provide a name for your load balancer.
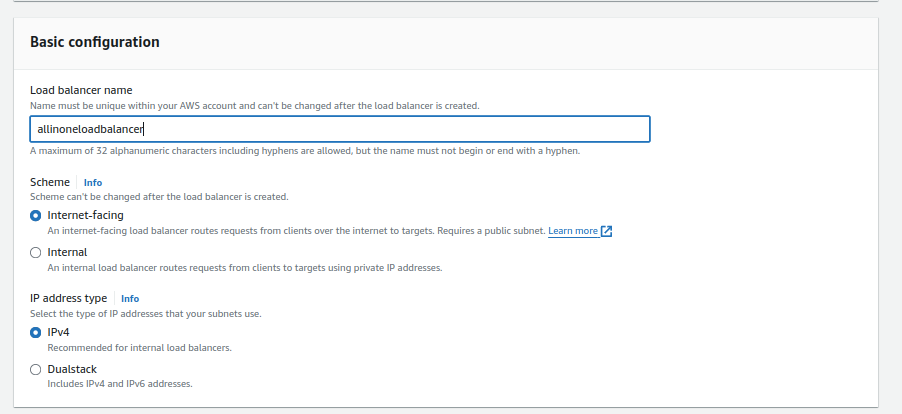
- Select the VPC and at least two subnets. You can use the default VPC or your custom VPC.
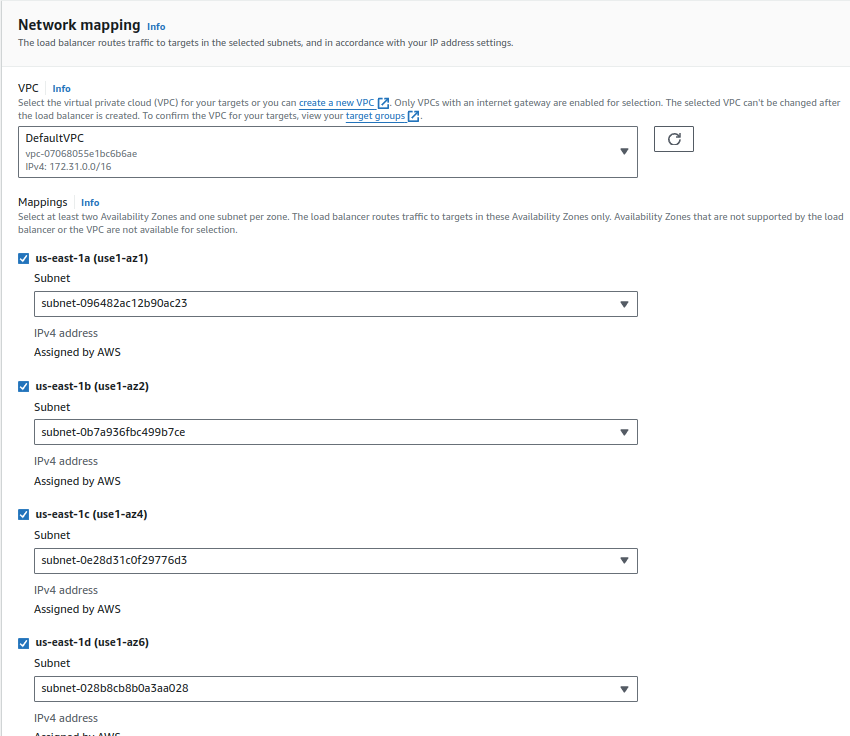
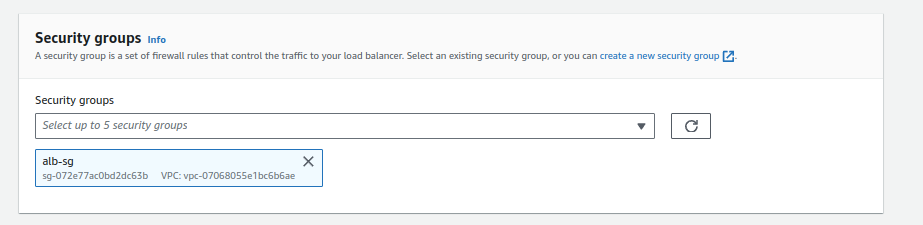
- Choose a security group with ports 80 and 443 open (e.g., “alb-sg”).
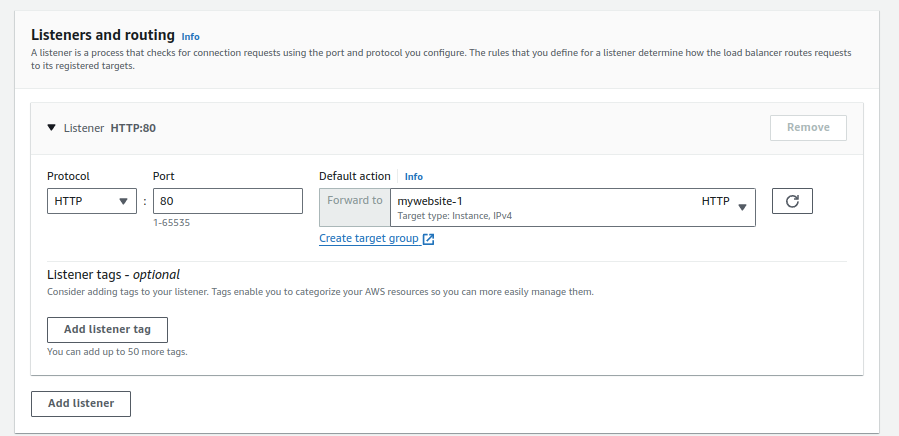
4.Configuring Listener and Forwarding Rules:
- Create an HTTP listener.
- Forward traffic to one of your target groups (e.g., Mywebsite-1).
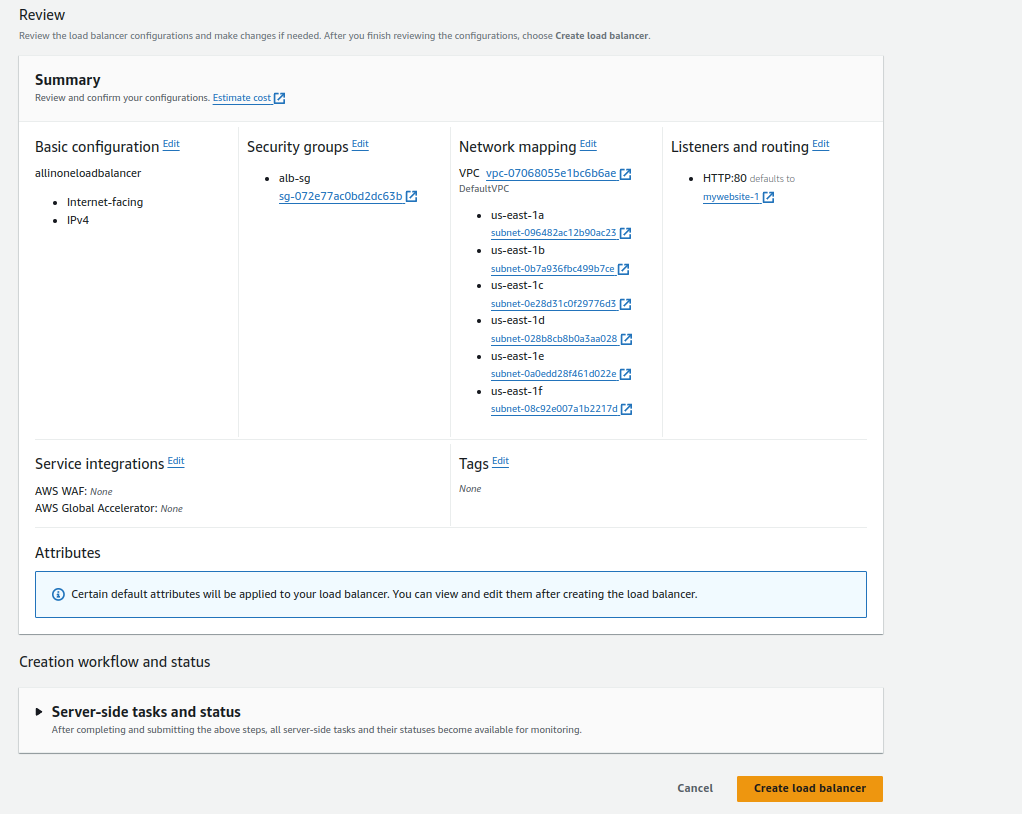
5.Review and Create:
- Review the summary of your configuration.
- Click “Create Load Balancer” to finalize the setup.
Step 4: Pointing Domains to Load Balancer
1.Accessing Domain Hosting Provider:
- Open your domain hosting provider, in this case, we are using AWS Route 53.
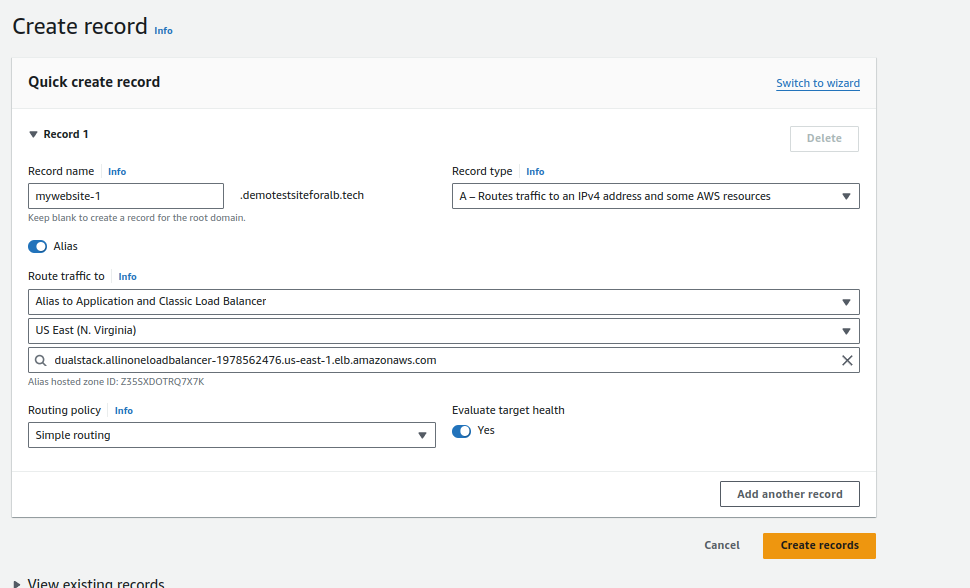
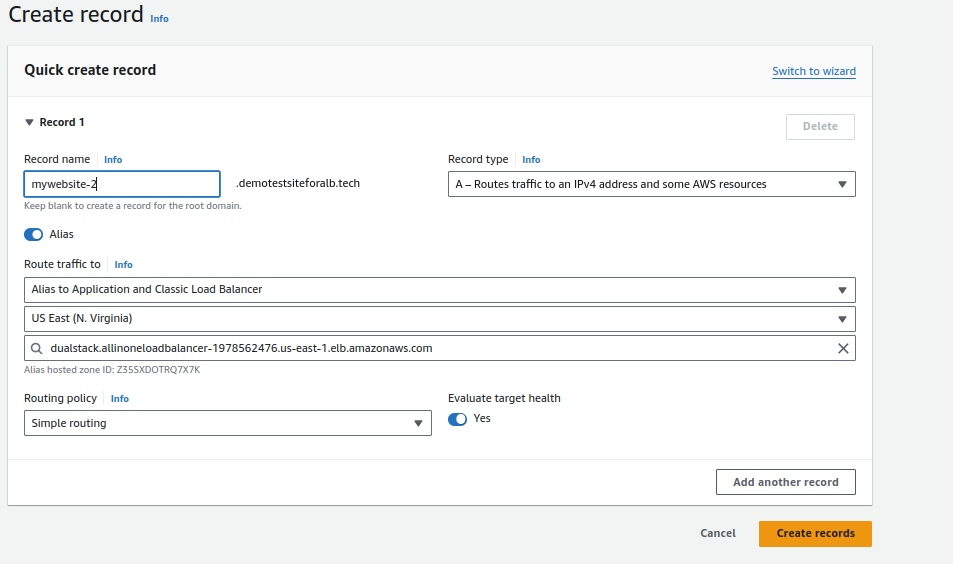
2.Pointing Domains:
- Point both of your domains, e.g., mywebsite-1.demotestsiteforalb.tech and mywebsite-2.demotestsiteforalb.tech, to the DNS of your Application Load Balancer (ALB).
Step 5: Creating SSL Certificates
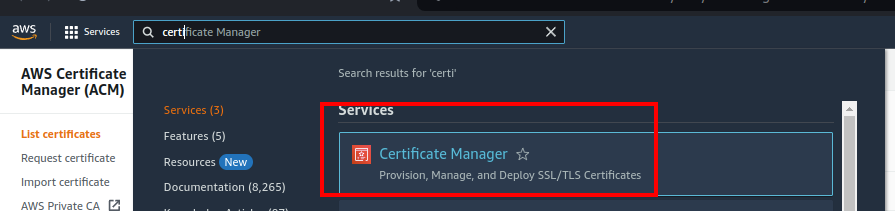
1.Accessing Certificate Manager:
- Navigate to AWS Certificate Manager.
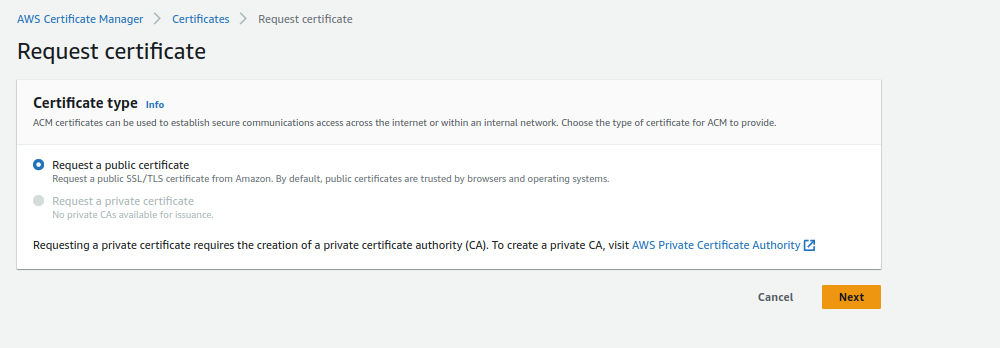
2.Requesting a Public Certificate:
- Click on “Request a public certificate.”

- Enter your domain names. Using a wildcard (*) is recommended for sub-domain structures.
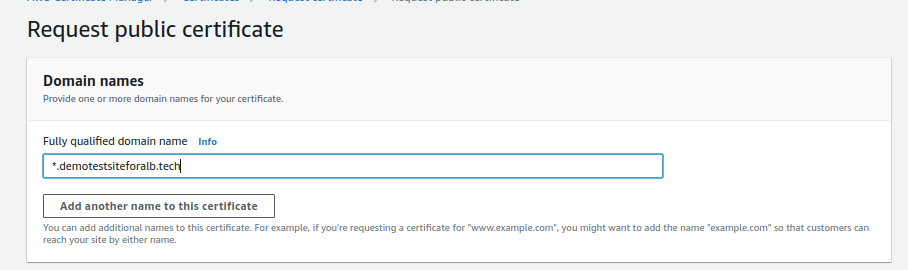
- Complete the certificate request.

Step 6: Setting Up Host-Based Routing
1.Returning to Load Balancer Configuration:
- Go back to your Application Load Balancer configuration.
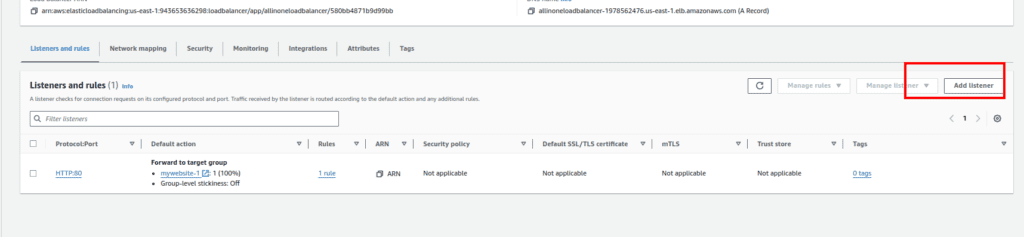
2.Adding HTTPS Listener:
- Click on “Add Listener” and choose HTTPS.
- Click “Return to fix response.”
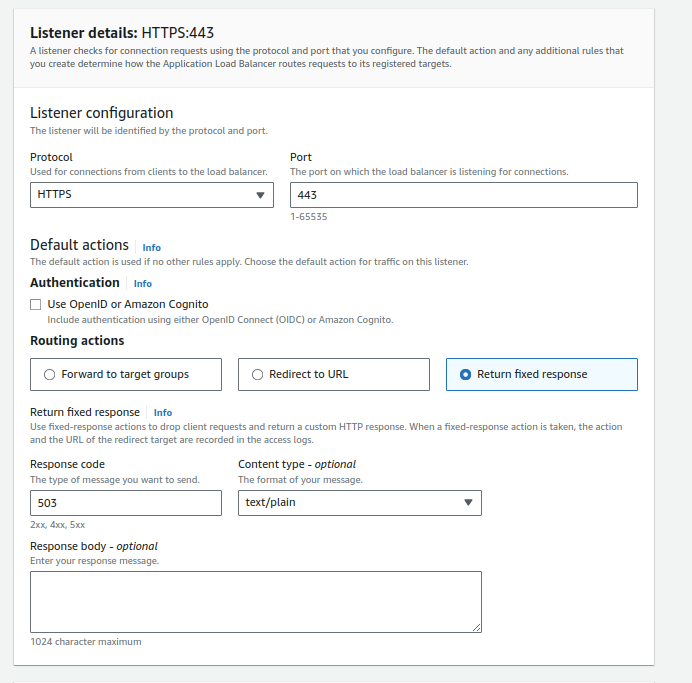
- Scroll down and choose certificate you requested
3.Configuring HTTPS Listener:
- Click on the created HTTPS listener.

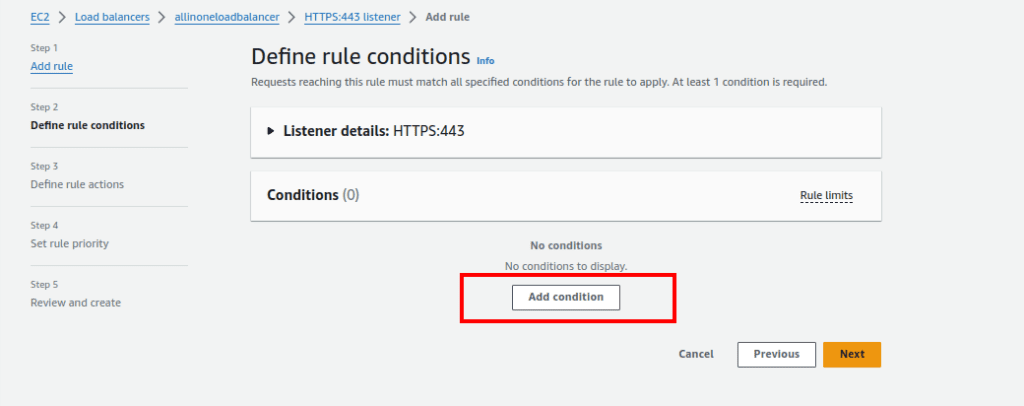
- Click “Add Rule.”

4.Configuring Rule:
- Optionally, give the rule a name.
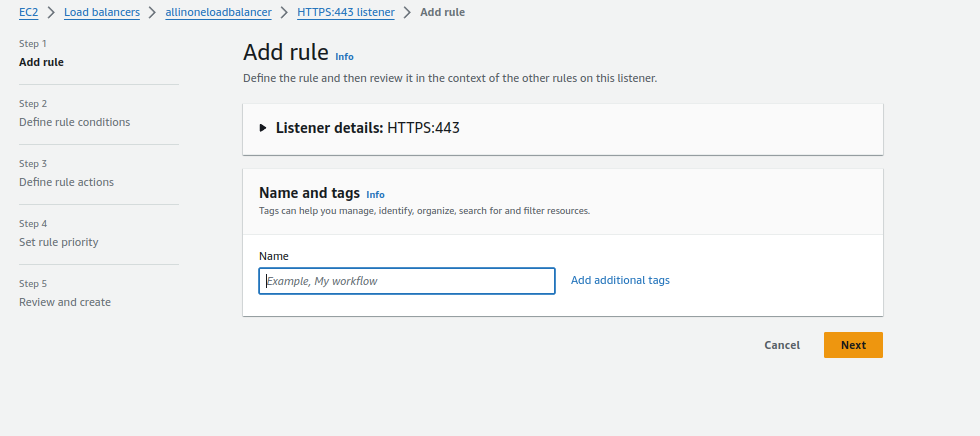
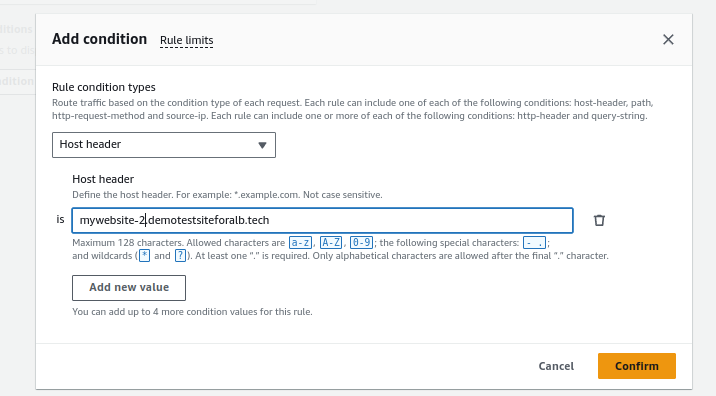
- Click “Add Condition.”
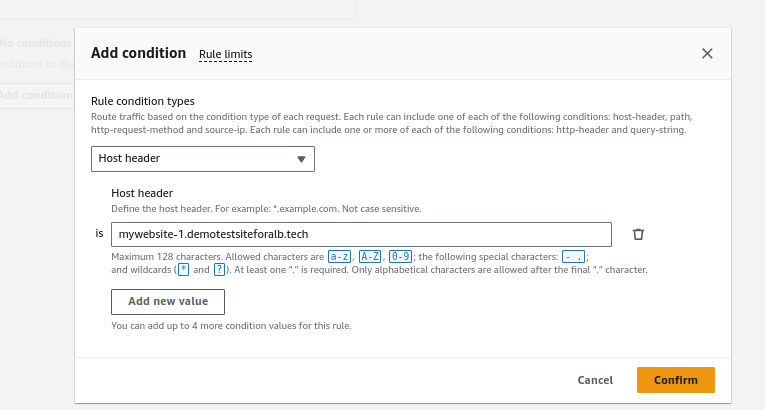
5.Setting Rule Condition:
- Choose “Host Header” as the rule condition.
- Enter the name for your first website in the Host Header value. Confirm.
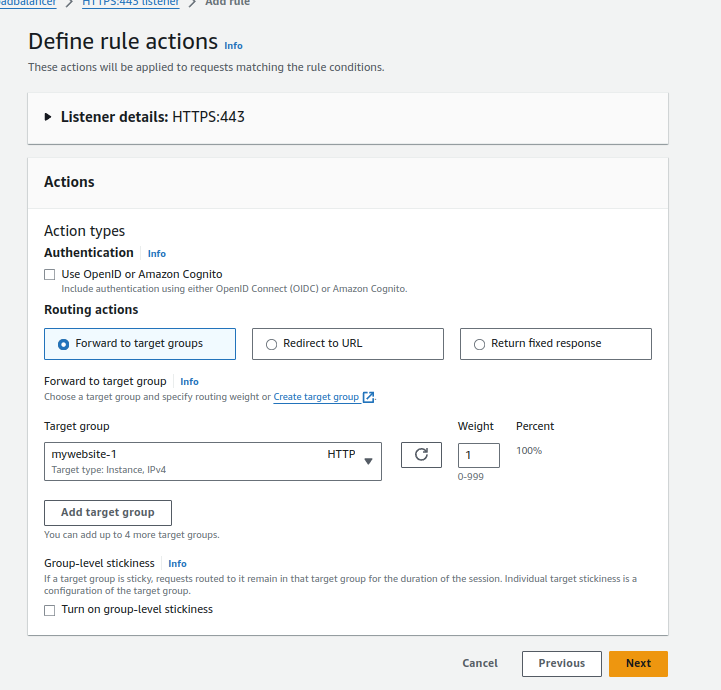
6.Forwarding to Target Group:
- Click “Forward to target group” and select the target group for the first website (e.g., Mywebsite-1).
- Click “Next.”
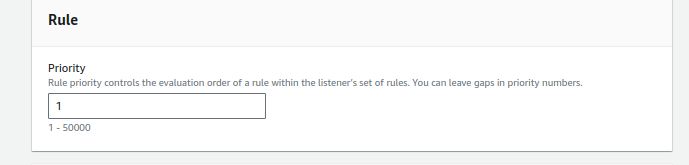
7.Setting Rule Priority:
- Give the rule a priority, such as 1.
- Click “Next.”
8.Review and Create:
- Review the configuration and click “Create.”
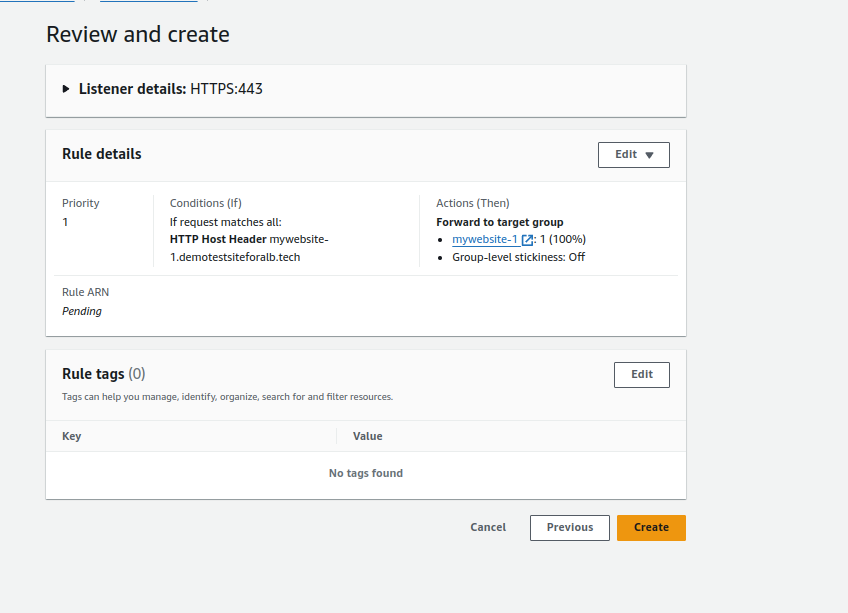
9.Repeating for Second Website:
- Repeat the process for the second website, changing the Host Header value and selecting the target group (e.g., Mywebsite-2).
- Give the rule a priority, such as 2.
- Review and create.
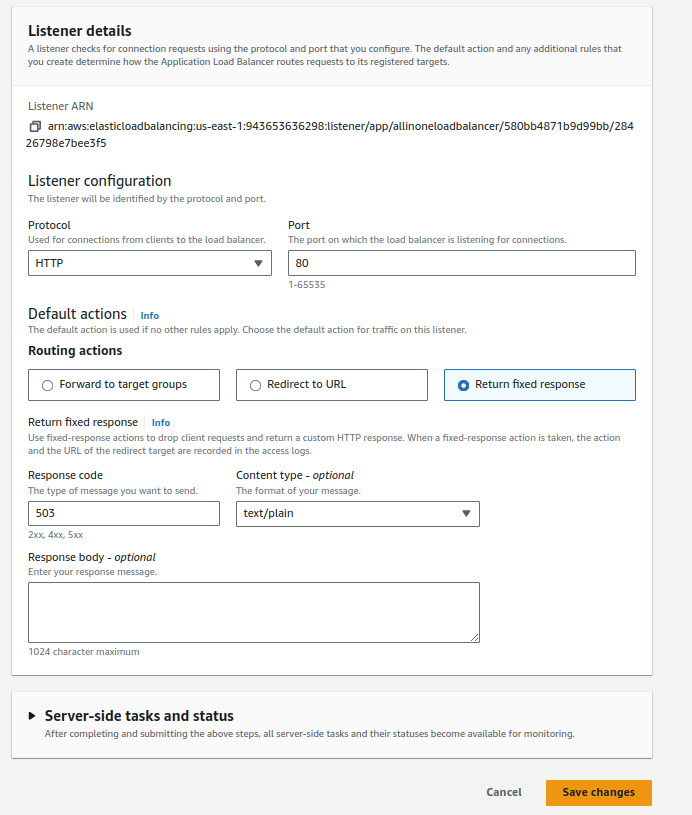
10. Block Port 80 and Configuring Fixed Response/Forward 80 to 443
Step 8: Testing Your Load Balancer Setup
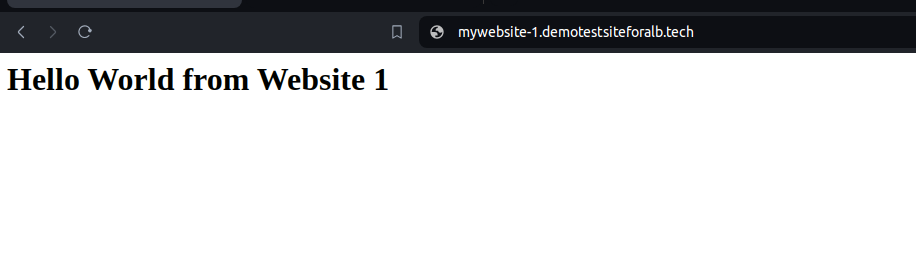
1.Open Web Browser:
- Launch your preferred web browser.
2.Enter the Website URLs:
- Enter the URLs of your websites in the address bar. For example:
- https://mywebsite-1.demotestsiteforalb.tech
- https://mywebsite-2.demotestsiteforalb.tech

3.Check Load Balancer in Action:
- Observe that the websites load successfully.
- Verify that the URL remains secure with “https://” and that the SSL certificate is valid.
Conclusion:
In conclusion, leveraging a single load balancer for multiple websites is a strategic approach that combines cost savings with improved performance and simplified management. By carefully configuring virtual hosts, optimizing SSL handling, and implementing scalable and flexible architectures, businesses can achieve an optimal balance between cost efficiency and a robust online presence. As the digital landscape continues to evolve, adopting such best practices becomes essential for staying competitive and ensuring a seamless user experience.

![[Working] How to install WordPress on Ubuntu 20.04 Linux | Azure VM](https://awan.com.np/wp-content/uploads/2021/07/Install-WordPress-on-Ubuntu-768x576.jpg)