How to Connect and Deploy Private GitHub Repositories to cPanel Shared Hosting using GitHub Actions

In this blog we are going to see the step by step process to connect and deploy the private GitHub repository to cPanel shared hosting using GitHub actions.
So, you are working on a project and using GitHub for version control. And you want to automate the deployment, so that every time you make push to GitHub, it gets automatically deployed to your cPanel shared hosting.
Who would just manually upload files to the cPanel every time you make some changers, OR do you 😉 ?
So, let’s get started.
GitHub to cPanel Deployment Flow
- You make changes to the project on local machine.
- You commit the changes and push the code to remote main branch.
- It automatically deploys your changes to the cPanel.
- Eat, Sleep, Repeat 1-3 until your project gets done.
There are multiple ways to deploy private GitHub repository to cPanel. In this blog, we are going to do it in a very simple way with FTP using GitHub Actions.
Steps to Deploy GitHub to cPanel
- Setup FTP account in your cPanel account.
- Setup Project in GitHub.
- GitHub action workflow configuration.
Create an FTP account on cPanel
In your cPanel go to FTP accounts.
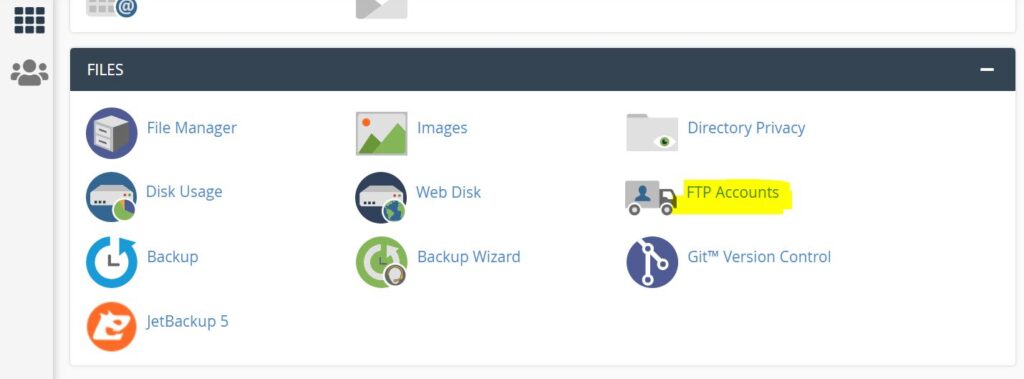
Provide the details and create the FTP account.
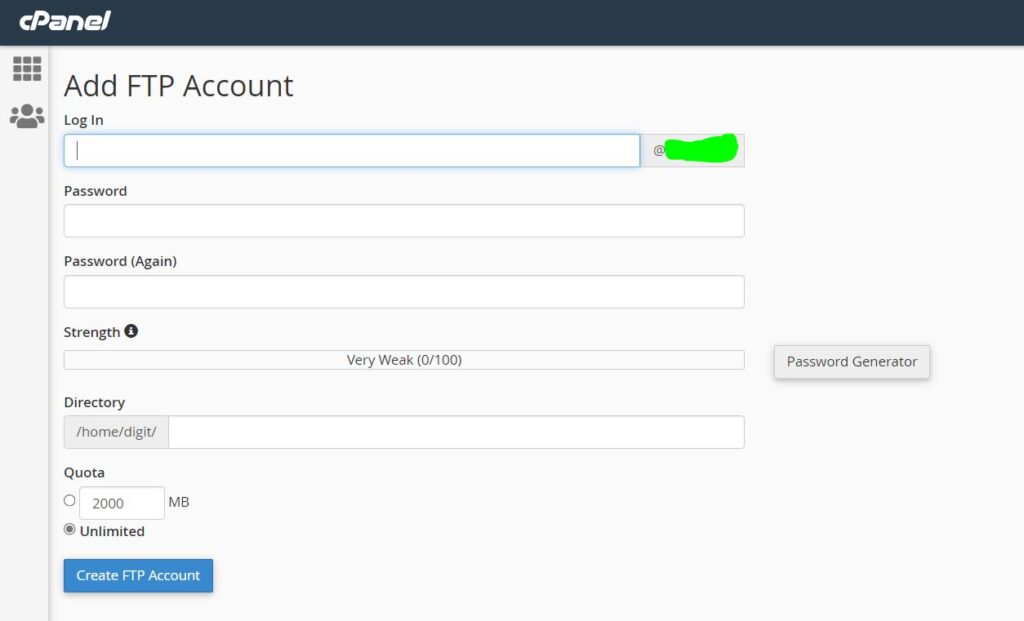
Save your ftp account username and password. Will need those later.
You will also need your hosting’s IP address. Not sure how to get that?
You can use this.
Setup Private GitHub Repository to deploy to cPanel
Setup your private GitHub repository.
I assume you have already done that.
For minimal setup, just an index.html file with something on it should be enough.
Add GitHub Secrets
Now, go to your private repository on GitHub.
Click on SETTINGS, then click on SECRETS -> ACTIONS to add your FTP account username, password and server IP.
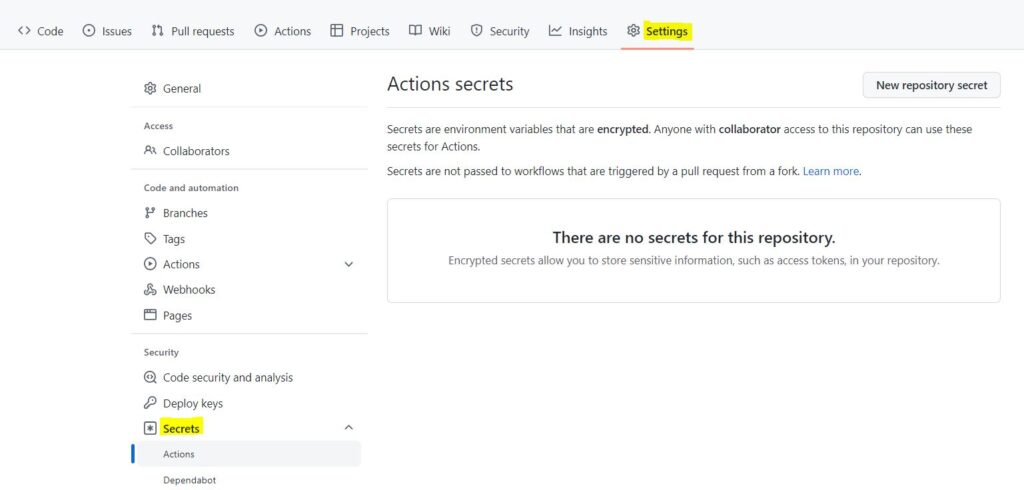
Click on New Repository Secret . Then add the Name and Values for FTP server, username and password. For values, use your cPanel IP, username and password that you had created earlier.
For example, for FTP username would be: FTP_USERNAME as Name and awan@awan.com as Value.

The click on Add Secret. Final result should look something like:

GitHub Actions Workflow for cPanel Deployment
In your GitHub repository, click on ACTIONS.
Click on set up a workflow yourself.
Now, we need to edit the yaml file. You can also change its name. As you can see, its main.yml here.

Now write the configuration code below into the file.
name: Deploy Private GitHub repository to cPanel
on:
  push:
    branches:
      - main
jobs:
  FTP-Deploy-Action:
    name: FTP-Deploy-Action
    runs-on: ubuntu-latest
    steps:
    - uses: actions/checkout@v2.1.0
      with:
        fetch-depth: 2
    - name: FTP-Deploy-Action
      uses: SamKirkland/FTP-Deploy-Action@4.3.0
      with:
        server: ${{ secrets.FTP_SERVER }}
        username: ${{ secrets.FTP_USERNAME }}
        password: ${{ secrets.FTP_PASSWORD }}
Change the branch if you want it to setup for other branches.
Finally, start on Start Commit. This will create a new workflow directory and place the configuration code in it.
Now anytime you push to the main branch, it automatically deploys to the cPanel via the FTP account.
Once you commit, go the Actions tab, there you can see the progress: whether its running, successfully deployed or failed.

And, that’s it.
Now, every time you make a push to the remote main branch, you should see the changes in your website, after a while.
You can also check for changes in your cPanel file explorer.
How The Web Works | Behind the scenes of a Website
In this way, you can deploy the private GitHub repository code to cPanel shared hosting using GitHub actions.


![[Working] How to install WordPress on Ubuntu 20.04 Linux | Azure VM](https://awan.com.np/wp-content/uploads/2021/07/Install-WordPress-on-Ubuntu-768x576.jpg)
